DIY Sunscreen Recipe for Fun in the Sun
Hey there, sun lovers! Summer is here, and it’s time to bask in the warm glow of the great outdoors. But before we grab our shades, flip-flops, and gigantor sun hats, let’s talk sunscreen! We all know how crucial it is to protect our skin from harmful UV rays, and there are so many spf’s to choose from (seriously, where do we even begin!?)… but what if we make our own dang sunscreen?
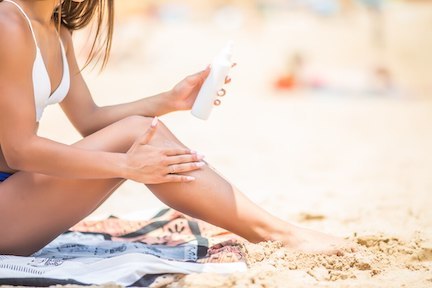
 Photo provided by www.freepik.com
Why DIY Sunscreen?
First off, why go the DIY route? Well, making your own sunscreen means you know exactly what’s going into it—no mysterious chemicals or tongue-twisting ingredients. Plus, it’s a fun project that you can customize to suit your skin’s needs. And let’s be honest, telling people you make your own sunscreen is pretty dang cool!
What You’ll Need
Before we get started, let’s gather our ingredients.
- 1/2 cup coconut oil: Because who doesn’t want to smell like a tropical paradise?
- 1/4 cup shea butter: Smooth as butter, literally.
- 1/4 cup candelilla wax pellets: To keep things nice and solid (just like your resolve to avoid sunburn).
- 2 tablespoons non-nano zinc oxide: The secret sauce for sun protection. Make sure it’s non-nano so it doesn’t absorb into your skin.
- 10 drops of carrot seed oil: Packed with natural SPF.
- 10 drops of raspberry seed oil: Another SPF superstar.
- Optional: Essential oils for fragrance: Lavender, eucalyptus, or whatever tickles your fancy.
The Fun Part: Making Your Sunscreen
- Melt the Base: In a double boiler (or a heatproof bowl over a pot of simmering water), combine the coconut oil, shea butter, and candelilla wax. Stir occasionally until everything is melted and well-blended. Try not to get too mesmerized by the melting magic!
- Cool It Down: Once everything is melted, remove the mixture from heat and let it cool for a few minutes. We don’t want it to solidify, just cool enough to add our superstar ingredients.
- Mix in the Magic: Stir in the zinc oxide, carrot seed oil, and raspberry seed oil. Be careful with the zinc oxide—avoid inhaling the powder. It’s powerful, but it’s not meant for your lungs!
- Add Some Fragrance: If you’re feeling fancy, now’s the time to add a few drops of your favorite essential oils. Think of it as customizing your sunscreen’s personality.
- Pour and Chill: Pour the mixture into a glass jar or tin and let it cool completely. You can speed up the process by popping it in the fridge if you’re in a hurry to hit the beach.
Applying Your Sunscreen
Now that you have your very own homemade sunscreen, it’s time to apply it. Scoop out a small amount and rub it onto your skin. Remember, a little goes a long way! And don’t forget those often-missed spots like the tops of your ears, back of your neck, and your nose. Your skin will thank you for the TLC!
A Few Notes
- Test It Out: Everyone’s skin is different, so do a patch test to make sure your skin loves your new creation as much as you do.
- Reapply Often: Just like store-bought sunscreen, you’ll need to reapply every couple of hours, especially if you’re swimming or sweating.
- Storage: Keep your sunscreen in a cool, dry place. If it gets too warm, it might melt, but don’t worry—just pop it back in the fridge to solidify.
Embrace the Sunshine!
Congratulations, you’ve just made your very own sunscreen! Now you can enjoy the sun knowing you’ve got a layer of natural protection on your side. Whether you’re hitting the beach, hiking a trail, or just lounging in your backyard, your skin is covered—literally. Cheers to sunny days and happy skin! 🌞🏖️🌿
Post contains affiliate links.
About Sunny (Sunny's Profile)
Longtime vegan, hardcore compassionate beauty junkie, serious cake aficionado, and lover of all things floofy and sparkly! If there's something in particular you'd like me to review, drop me a line at Sunny@VeganBeautyReview.com. You can also find me on Facebook, Instagram, Twitter, YouTube, and Google +.Filed in: DIY vegan beauty products • vegan sunscreen


